Huitznahua
Content Creator
- Joined
- Feb 6, 2014
People asking for help for things that have already answered many times bother me. I don’t think there's any wrong question but you will agree that this is annoying when people always ask the same questions again and again. So, rather than being constantly frustrated, I decided to work on a detailed tutorial to help very newbie user.
If you think that some parts of this tutorial are too much and unnecessarily detailed, please keep in mind that I tried to build it by answering the newbies questions that I've seen recently. I should also mention that english is not my native language, I may have made some mistakes. So I will be glad to get help from other experienced users by correcting me when I say bullshit or by specifying the details that I would have forgotten.
Summary :
Getting started
If you haven’t did it yet, you can start by reading the Getting Started with SDT thread by @stuntcock. I’m repeating his advice : download the @ModGuy Loader Bundle or the sby
Loader Pack. The
 sby
Loader Pack contain a lot of stuff and guides. So get this pack if you want the game AND learn a lot about loader settings, animtools configurations, … by yourself. For this tutorial I will start with the @ModGuy Loader Bundle in order to gradually explain the features of the game.
Download the game
Here is the thread for the @ModGuy Loader Bundle. Click on the download button and save the ".zip" file on your computer.
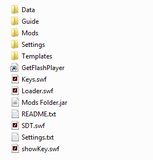
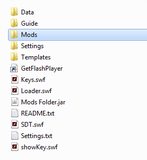
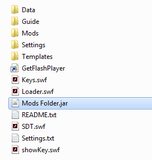
Right click on the ".zip" file and select “Extract to Loader.v5.45.ModGuy\”. Inside this folder you should have the following files.
Download the Flash player projector
If you chose to download the sby
Loader Pack you can skip this part because
 sby
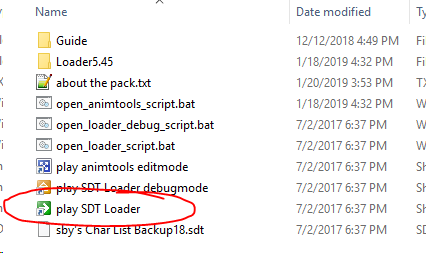
already include the version 11 of the projector in his pack. Just click on the shortcut "play SDT Loader" to launch the game.
EDIT by moderator: Deleted section about going to Adobe support, dead link
Inside the folder "Loader.v5.45.ModGuy", right click on the "Loader.swf", choose "Open with..." and choose the Adobe Flash Player. Now you will be able to directly launch the games on your computer, without using any browser.
Launch the game
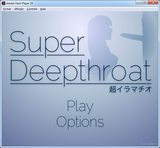
Double click on “Loader.swf” and congratulations : you have launch the game !
Customization and modding
Vanilla quick overview
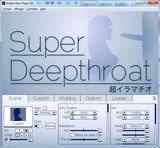
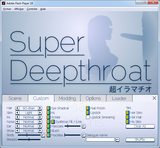
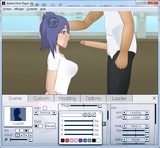
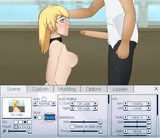
If you click on “Play” you start directly the game. If you click on “Options” you can customize the game in several ways. The two firsts tab allows you to customize the vanilla features : her/his skin, boobs size, her/his clothes, the background, her hair … and a lot of others things.
I encourage you to test all of this by yourself, it's very simple.
Before moving on the most interesting tab ("Modding"), I would point out that even if you have click on "Play", it is possible at any time in the game to access the options tabs by pointing the mouse at the bottom of the game area or by pressing the key "Y", "U", "I", "O", "P" of your keyboard.
Download from undertow.club
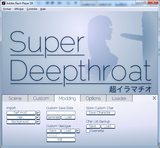
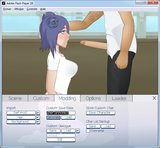
Take a look at the “Modding” tab. Here you can add to the game all the stuff (hair, outfit, background, dialogues) made by the sdt community.
Let ‘s try to download some hair on the Mineur
thread : Mineur's Imports.
Take the first one : Konan (Naruto).
Click on the picture near “Template:”.
And click on the up right arrow to take a closer look.
And here we are ! This is the hair mod.
Right click and save it. Back on your computer, I advise you to open the “Mods” folder.
And then create a new folder call “Downloads” and move the file "Konan.png" which we just downloaded into this folder. (This folder will be useful later. Don’t worry about the other files in the "Mods" folder : I will speak about them later too).
Now we are ready to mod the game but, for the record, I also wish to show you how to search on download a mod from the Resource Manager. (If you don’t care you can go on the next part of this tutorial).
To browse all the mods available click on the “Downloads” tab which should appears on the top of any page of the website. For this demonstration I’ll take the same mod than before. Click on the search bar on the top right and then on the button “More”.
Click on “Search download” and then tape “konan” in the keywords bar.
Click on search or tape the key "Enter" on your keyboard and you should have one result.
Click on the title “Konan Static Hair” or on the thumbnail and here you are on the specific "konan.png" mod page of the Ressource Manager.
If you can’t see the big blue button “Download Now” with the size and the extension of the file it might be because you aren’t log to the website. You can see that when I’m log out, instead of "Download Now" I see "Download Not Available".
Make sure you are log in and click the big blue button “Download Now”. You should have the exact thing that we saw previously.
Right click, save on your computer and move it into your "Downloads" folder (if you already download the file you can skip this part).
Modding
On the "Modding" tab, click on “Hair…” and choose the "konan.png" file which we have download previously.
Congratulation you have successfully mod your game !
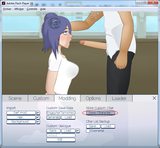
Look at the three “Import” buttons on the “Mods” tab which allow us to load different kind of stuff in the game :
“Custom Save Data” allow to generate or load a character code (or “charCode”). To summarize I would say it contains all the customization information that can be set in the first two tabs “Scene” and “Custom”. Let’s try !
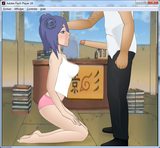
Still with Konan, I have made some change on the first tab : set her arms on her legs, give her a white shirt and a pink panty, remove this ugly collar and cuffs, …
And then click on generate on the “Mods” tab. Some highlighted text should appears on the upper text textbar. Press “ctrl” + “c” to copy this code.
Back to your computer create a new text file into your "Downloads" folder and rename it “konan.txt”. Open it with your favorited text editor (notepad++ for me) and paste the code that we have previously generate on the “Mods” tab of the game. Now you should have something like this :
This is all the modifications that we have done previously in the game which are now save into a .txt file. The structure is quite simple, each element between two “;” correspond to an element in game. For example “mood:Normal” means that we set her mood on Normal and “panties:briefs,255,167,188,1;” means that we give her a briefs with the RBG code 255,167,188 (which is the color pink).
If you want to reuse this code to the game you can copy it from your ”konan.txt” file and paste it into the “Custom Save Data” on the “Mods” tab of the game. We will see later how to save more effectively our characters.
“Custom Dialogue” allow you to customize what she/he can say during the game. If you want to test this features you can download a dialogue on the forum and then load it to the game through the “Load…” button in the “Custom Dialogue” section.
Saving character
They are two way to save character :
Store custom char
First we need to customize a character. We can reuse our previous example : Konan. Load her hair, make the same modifications than before OR you can reuse the charCode like I said before.
When it’s done click on the “Store Custom Char” button.
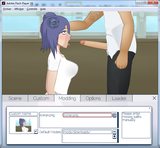
A new window should appears instead of the modding tab. The text bar highlighted in red and the text box on the right indicates that the game can’t find themod so you can’t save the character.
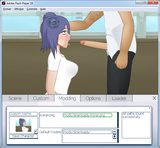
It’s easy to fix. Delete the textbar on the bottom by clicking on the sign “-“ and add the relative path of the mod in the upper textbar. In our case we need to add “Mods\Downloads\” before Konan.png. Click on the button with an arrow next to the text bar to refresh and now the bar is highlighted in green, the text box on the right say that all path have been properly found and the “Save Character” buttons appeared under the thumbnail.
Now you need to rename the character and click on “Save Character”.
As soon as you click on “Save Character” the game switches to the first tab and shows you that your character has been registered at the end of the list of characters.
When the game can’t find the mod , instead of deleting the bottom text bar you can add the relative path here.
If clicking on the button with an arrow doesn’t work, you can : close this little windows, reload the hair (which means click again on “Hair…” and choose again the “Konan.png” file) and click again on “Save Character…”. You should be able to save your character like we saw before.
Saving by using the default folders textbar is useful when you want to save a character with several mod (custom hair, custom background, …).
Note : with the Loader this method doesn't fully support the saves of .swf file . It's preferable to use this with the Vanilla game only.
Character folder
The character folder procedure is more accurate than the previous method but also a bit more complicated.
For this demonstration I will use more than one mod. This isn’t necessary but you can start by improve the organization of your “Downloads” folder with subfolders to sort mods by kind (“Hair”, “Background”, …) or by authors, … . For this example I'll just throw all modes directly in the “Downloads” folder.
So, download the new mods and move them in the “Downloads" folder for now. I have already described at the beginning of the tutorial how to download mods from the forum, this time I'll just give links to the files :
Now it’s time to properly create our character folders. In the “Mods” folder create a new folder and rename it "Konan".
Then open the “CharacterFolders.txt” file and add “Konan:Konan”. This txt file lists all the characters that will be loaded by the Loader. The words before “:” are the names that it will appear in game (you can leave them blank if you want). The words after “:” are the name of the folder that you have create (The game will not load the character if the name isn't the same than the folder's name). The name within the brackets “[“ and “]” indicates that it’s a folder with one or more subfolders. In our case we could create a folder “Naruto” where we could place the Konan folder and many other folders for other Naruto’s characters.
Now we need to complete the Konan folder by adding some files. But before I will detail all file types that can be found in a character folder :
Back to our example. Create a “Code.txt” file in the Konan folder. Open it and add this character code.
This is the same charCode that we used before but with few changes. The most important changes are the two configuration lines that we add at the end (make sure you have put these two files (hair and background) in the "Downloads" folder).This configuration lines are useful if you want to use several times the same hair mod but without adding this hair file in different character folder.
Then, move the “Cleavage_Top_Tank.swf” and the “Thumb.png” files to the Konan folder.
Create a new “.txt” file called “Mods.txt”. Open it and add the name of the “.swf” file : “Cleavage_Top_Tank.swf”.
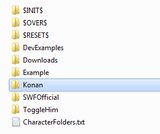
Your Konan folder is ready now and it should be looks like this.
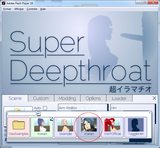
The character folder is complete, launch the game. As you can see a new character appears.
Click on the thumbnail and congratulation ! You just created your first character folder successfully.
Special mods folders
All the following informations can be found in the @ModGuy tutorial thread
INIT, OVER and RESET
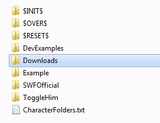
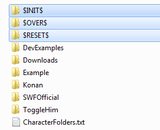
You may have seen some particulars folders when you take a look in the “Mods” folder for the first time.
The “$INIT$” folder allow you to automatically load all the mods in this folder when you launch the Loader. Personally, I don't like the vanilla character (sorry SD-chan). So, I’m using the "$INIT$" with my favorite character.
For example, copy and paste the “Code.txt” from the “Konan” folder to the “$INIT$” folder.
And now you should see the “Konan” character as soon as you launch the game.
The “$INIT$” folder is also used to automatically load mods with special features like animtools or moreclothings, ….
The “$RESET$” folder allow you to automatically load all the mods in this folder when you click on “Reset” in game.
OMG ! SD-chan is back !
The vanilla character is back because our “$RESET$” folder was empty. So, make the same modifications than before (copy and paste the “Code.txt” file used in our previous example) if you want your favorite character persists even after clicking on “Reset”.
The "$OVER$" folder allow you to automatically load all the mods in this folder over any other character folder. This can be useful to repeat some traits for various characters.
Mods Folder.jar
Instead of updating the “CharacterFolders.txt” file manually each time you add a character folder, you can use the “Mods Folder.jar” in the “Loader.v5.45.ModGuy” folder to automatically update it.
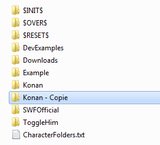
Let’s try. Simply duplicate the “Konan“ folder and don’t manually update the “CharacterFolders.txt” file !
To add the new folder to the “CharacterFolders.txt” file, double click “Mods Folder.jar” in the “Loader.v5.45.ModGuy” folder.
Nothing pop up to tells you what happened. Just check your “CharacterFolders.txt”.
As you can see the new folder appears ! This can be useful if you want to add multiple folders at the same time.
If you think that some parts of this tutorial are too much and unnecessarily detailed, please keep in mind that I tried to build it by answering the newbies questions that I've seen recently. I should also mention that english is not my native language, I may have made some mistakes. So I will be glad to get help from other experienced users by correcting me when I say bullshit or by specifying the details that I would have forgotten.
Summary :
- Getting started
- Download the game
- Download the Flash player projector
- Launch the game
- Customization and modding
- Vanilla quick overview
- Download from undertow.club
- Modding
- Saving character
- Store custom char
- Character Folder
- Special mods folder
- INIT, OVER and RESET
- Mods Folder.jar
Getting started
If you haven’t did it yet, you can start by reading the Getting Started with SDT thread by @stuntcock. I’m repeating his advice : download the @ModGuy Loader Bundle or the
Download the game
Here is the thread for the @ModGuy Loader Bundle. Click on the download button and save the ".zip" file on your computer.
Right click on the ".zip" file and select “Extract to Loader.v5.45.ModGuy\”. Inside this folder you should have the following files.
Download the Flash player projector
If you chose to download the
EDIT by moderator: Deleted section about going to Adobe support, dead link
Inside the folder "Loader.v5.45.ModGuy", right click on the "Loader.swf", choose "Open with..." and choose the Adobe Flash Player. Now you will be able to directly launch the games on your computer, without using any browser.
Launch the game
Double click on “Loader.swf” and congratulations : you have launch the game !
Customization and modding
Vanilla quick overview
If you click on “Play” you start directly the game. If you click on “Options” you can customize the game in several ways. The two firsts tab allows you to customize the vanilla features : her/his skin, boobs size, her/his clothes, the background, her hair … and a lot of others things.
I encourage you to test all of this by yourself, it's very simple.
Before moving on the most interesting tab ("Modding"), I would point out that even if you have click on "Play", it is possible at any time in the game to access the options tabs by pointing the mouse at the bottom of the game area or by pressing the key "Y", "U", "I", "O", "P" of your keyboard.
Download from undertow.club
Take a look at the “Modding” tab. Here you can add to the game all the stuff (hair, outfit, background, dialogues) made by the sdt community.
Let ‘s try to download some hair on the
Take the first one : Konan (Naruto).
Click on the picture near “Template:”.
And click on the up right arrow to take a closer look.
And here we are ! This is the hair mod.
Right click and save it. Back on your computer, I advise you to open the “Mods” folder.
And then create a new folder call “Downloads” and move the file "Konan.png" which we just downloaded into this folder. (This folder will be useful later. Don’t worry about the other files in the "Mods" folder : I will speak about them later too).
Now we are ready to mod the game but, for the record, I also wish to show you how to search on download a mod from the Resource Manager. (If you don’t care you can go on the next part of this tutorial).
To browse all the mods available click on the “Downloads” tab which should appears on the top of any page of the website. For this demonstration I’ll take the same mod than before. Click on the search bar on the top right and then on the button “More”.
Click on “Search download” and then tape “konan” in the keywords bar.
Click on search or tape the key "Enter" on your keyboard and you should have one result.
Click on the title “Konan Static Hair” or on the thumbnail and here you are on the specific "konan.png" mod page of the Ressource Manager.
If you can’t see the big blue button “Download Now” with the size and the extension of the file it might be because you aren’t log to the website. You can see that when I’m log out, instead of "Download Now" I see "Download Not Available".
Make sure you are log in and click the big blue button “Download Now”. You should have the exact thing that we saw previously.
Right click, save on your computer and move it into your "Downloads" folder (if you already download the file you can skip this part).
Modding
On the "Modding" tab, click on “Hair…” and choose the "konan.png" file which we have download previously.
Congratulation you have successfully mod your game !
Look at the three “Import” buttons on the “Mods” tab which allow us to load different kind of stuff in the game :
- “Swf.mod..;” : load .swf files (or .mod) which are mostly clothes and dynamic hair ;
- “Hair…” : as we have seen just previously, load static hairs (.png) ;
- “Background…” : load static background (mostly .png or .jpg).
“Custom Save Data” allow to generate or load a character code (or “charCode”). To summarize I would say it contains all the customization information that can be set in the first two tabs “Scene” and “Custom”. Let’s try !
Still with Konan, I have made some change on the first tab : set her arms on her legs, give her a white shirt and a pink panty, remove this ugly collar and cuffs, …
And then click on generate on the “Mods” tab. Some highlighted text should appears on the upper text textbar. Press “ctrl” + “c” to copy this code.
Back to your computer create a new text file into your "Downloads" folder and rename it “konan.txt”. Open it with your favorited text editor (notepad++ for me) and paste the code that we have previously generate on the “Mods” tab of the game. Now you should have something like this :
Code:
charName:SD chan;mood:Normal;bodyScale:1;arms:onlegs,onlegs;throatResist:50;hair:sdchan,1,1;iris:normal,56,100,137,1;breasts:70;skin:light;nose:normal;ear:normal;lipstick:0,0,0,0,0;eyeshadow:55,26,99,1;sclera:255,255,255,1;blush:196,80,77,0.35;freckles:60,24,24,0.8,0;mascara:0,0,0,1,20;nailpolish:0,0,0,0;eyebrow:normal,89,67,51,1,0,0,0,1;hairhsl:0,1,1,1;skinhsl:0,1,1,1;hisskinhsl:0,1,1,1;bg:3;hisBody:male;hisPenis:0,1,1;balls:0,1;hisSkin:0;hisTop:shirt,238,242,245,1;hisBottoms:slacks,27,29,29,1;hisFootwear:loafers,0,0,0,1;collar:none,0,0,0,1,0,0,0,1;cuffs:none,0,0,0,1,0,0,0,1;gag:none,0,0,0,1;panties:briefs,255,167,188,1;top:none,255,255,255,1;armwear:none,0,0,0,1;tops:tshirt,255,255,255,1;legwear:none,0,0,0,1,0,0,0,1;footwear:none,0,0,0,1,0,0,0,1;eyewear:none,0,0,0,1;headwear:none,0,0,0,1,0,0,0,1;tonguePiercing:none,183,187,195,1;herTan:none,0This is all the modifications that we have done previously in the game which are now save into a .txt file. The structure is quite simple, each element between two “;” correspond to an element in game. For example “mood:Normal” means that we set her mood on Normal and “panties:briefs,255,167,188,1;” means that we give her a briefs with the RBG code 255,167,188 (which is the color pink).
If you want to reuse this code to the game you can copy it from your ”konan.txt” file and paste it into the “Custom Save Data” on the “Mods” tab of the game. We will see later how to save more effectively our characters.
“Custom Dialogue” allow you to customize what she/he can say during the game. If you want to test this features you can download a dialogue on the forum and then load it to the game through the “Load…” button in the “Custom Dialogue” section.
Saving character
They are two way to save character :
- The vanilla way which can be use with the vanilla game or with the Loader ;
- The character folder way which can be use only with the Loader.
Store custom char
First we need to customize a character. We can reuse our previous example : Konan. Load her hair, make the same modifications than before OR you can reuse the charCode like I said before.
If you want to reuse this code to the game you can copy it from your” konan.txt” file and paste it into the “Custom Save Data” on the “Mods” tab of the game. We will see later how to save more effectively our characters.
When it’s done click on the “Store Custom Char” button.
A new window should appears instead of the modding tab. The text bar highlighted in red and the text box on the right indicates that the game can’t find themod so you can’t save the character.
It’s easy to fix. Delete the textbar on the bottom by clicking on the sign “-“ and add the relative path of the mod in the upper textbar. In our case we need to add “Mods\Downloads\” before Konan.png. Click on the button with an arrow next to the text bar to refresh and now the bar is highlighted in green, the text box on the right say that all path have been properly found and the “Save Character” buttons appeared under the thumbnail.
Now you need to rename the character and click on “Save Character”.
As soon as you click on “Save Character” the game switches to the first tab and shows you that your character has been registered at the end of the list of characters.
When the game can’t find the mod , instead of deleting the bottom text bar you can add the relative path here.
If clicking on the button with an arrow doesn’t work, you can : close this little windows, reload the hair (which means click again on “Hair…” and choose again the “Konan.png” file) and click again on “Save Character…”. You should be able to save your character like we saw before.
Saving by using the default folders textbar is useful when you want to save a character with several mod (custom hair, custom background, …).
Note : with the Loader this method doesn't fully support the saves of .swf file . It's preferable to use this with the Vanilla game only.
Character folder
The character folder procedure is more accurate than the previous method but also a bit more complicated.
For this demonstration I will use more than one mod. This isn’t necessary but you can start by improve the organization of your “Downloads” folder with subfolders to sort mods by kind (“Hair”, “Background”, …) or by authors, … . For this example I'll just throw all modes directly in the “Downloads” folder.
So, download the new mods and move them in the “Downloads" folder for now. I have already described at the beginning of the tutorial how to download mods from the forum, this time I'll just give links to the files :
Now it’s time to properly create our character folders. In the “Mods” folder create a new folder and rename it "Konan".
Then open the “CharacterFolders.txt” file and add “Konan:Konan”. This txt file lists all the characters that will be loaded by the Loader. The words before “:” are the names that it will appear in game (you can leave them blank if you want). The words after “:” are the name of the folder that you have create (The game will not load the character if the name isn't the same than the folder's name). The name within the brackets “[“ and “]” indicates that it’s a folder with one or more subfolders. In our case we could create a folder “Naruto” where we could place the Konan folder and many other folders for other Naruto’s characters.
Now we need to complete the Konan folder by adding some files. But before I will detail all file types that can be found in a character folder :
- Code.txt : the list of all the changes made to the character ;
- someHair.png : When the hair are directly in the folder and rename "Hair.png" the loader automatically load the file. Otherwise you need to use a configuration line in your "Code.txt". For example "customHair:Mods\DOWNLOAD\Hair\Konan.png" ;
- someBG.png : Same principle for the background, you can rename it "BG.png" and add it to your charaFolder or add a configuration line in your "Code.txt";
- someDialogue.txt : you need to rename the dialogue script “Dialogue.txt” in order to load it automatically ;
- something.swf or something.mod : the recommended method is to add a Mods.txt file in your character folder with the list of “.swf” or “.mod” mods to load (a “.mod” file is just a “.swf” file with an extension deliberately altered by modders to indicate that "something.mod" can only be used with the loader). If you rename a “.swf” file as “char.swf” it will be load automatically (useful if you want to load a character mod like a dynamic hair with an embedded charCode) ;
- Mods.txt : the list of all the “.swf” or “.mod” mods to load for this character ;
- Thumb.png : the thumbnail that you can see when you choose a character in game.
Back to our example. Create a “Code.txt” file in the Konan folder. Open it and add this character code.
Code:
charName:Konan;mood:Normal;bodyScale:1;arms:onlegs,onlegs;throatResist:50;hair:sdchan,1,1;iris:normal,56,100,137,1;breasts:70;skin:light;nose:normal;ear:normal;lipstick:0,0,0,0,0;eyeshadow:55,26,99,1;sclera:255,255,255,1;blush:196,80,77,0.35;freckles:60,24,24,0.8,0;mascara:0,0,0,1,20;nailpolish:0,0,0,0;eyebrow:normal,89,67,51,1,0,0,0,1;hairhsl:0,1,1,1;skinhsl:0,1,1,1;hisskinhsl:0,1,1,1;bg:3;hisBody:male;hisPenis:0,1,1;balls:0,1;hisSkin:0;hisTop:shirt,238,242,245,1;hisBottoms:slacks,27,29,29,1;hisFootwear:loafers,0,0,0,1;collar:none,0,0,0,1,0,0,0,1;cuffs:none,0,0,0,1,0,0,0,1;gag:none,0,0,0,1;panties:briefs,255,167,188,1;top:none,255,255,255,1;armwear:none,0,0,0,1;tops:none,255,255,255,1;legwear:none,0,0,0,1,0,0,0,1;footwear:none,0,0,0,1,0,0,0,1;eyewear:none,0,0,0,1;headwear:none,0,0,0,1,0,0,0,1;tonguePiercing:none,183,187,195,1;herTan:none,0;customBG:Mods\Downloads\Hokage_Office.png;customHair:Mods\Downloads\Konan.png;This is the same charCode that we used before but with few changes. The most important changes are the two configuration lines that we add at the end (make sure you have put these two files (hair and background) in the "Downloads" folder).This configuration lines are useful if you want to use several times the same hair mod but without adding this hair file in different character folder.
Then, move the “Cleavage_Top_Tank.swf” and the “Thumb.png” files to the Konan folder.
Create a new “.txt” file called “Mods.txt”. Open it and add the name of the “.swf” file : “Cleavage_Top_Tank.swf”.
Your Konan folder is ready now and it should be looks like this.
The character folder is complete, launch the game. As you can see a new character appears.
Click on the thumbnail and congratulation ! You just created your first character folder successfully.
Special mods folders
All the following informations can be found in the @ModGuy tutorial thread
INIT, OVER and RESET
You may have seen some particulars folders when you take a look in the “Mods” folder for the first time.
The “$INIT$” folder allow you to automatically load all the mods in this folder when you launch the Loader. Personally, I don't like the vanilla character (sorry SD-chan). So, I’m using the "$INIT$" with my favorite character.
For example, copy and paste the “Code.txt” from the “Konan” folder to the “$INIT$” folder.
And now you should see the “Konan” character as soon as you launch the game.
The “$INIT$” folder is also used to automatically load mods with special features like animtools or moreclothings, ….
The “$RESET$” folder allow you to automatically load all the mods in this folder when you click on “Reset” in game.
OMG ! SD-chan is back !
The vanilla character is back because our “$RESET$” folder was empty. So, make the same modifications than before (copy and paste the “Code.txt” file used in our previous example) if you want your favorite character persists even after clicking on “Reset”.
The "$OVER$" folder allow you to automatically load all the mods in this folder over any other character folder. This can be useful to repeat some traits for various characters.
Mods Folder.jar
Instead of updating the “CharacterFolders.txt” file manually each time you add a character folder, you can use the “Mods Folder.jar” in the “Loader.v5.45.ModGuy” folder to automatically update it.
Let’s try. Simply duplicate the “Konan“ folder and don’t manually update the “CharacterFolders.txt” file !
To add the new folder to the “CharacterFolders.txt” file, double click “Mods Folder.jar” in the “Loader.v5.45.ModGuy” folder.
Nothing pop up to tells you what happened. Just check your “CharacterFolders.txt”.
As you can see the new folder appears ! This can be useful if you want to add multiple folders at the same time.
Last edited by a moderator:

