Saekano Girls (Megumi Ponytail WiP) (1 Viewer)

4dascience

Potential Patron
Joined
Nov 25, 2015
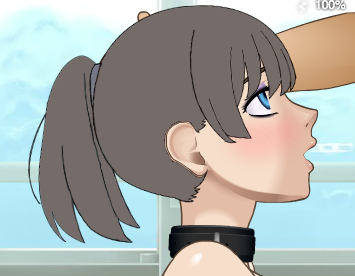
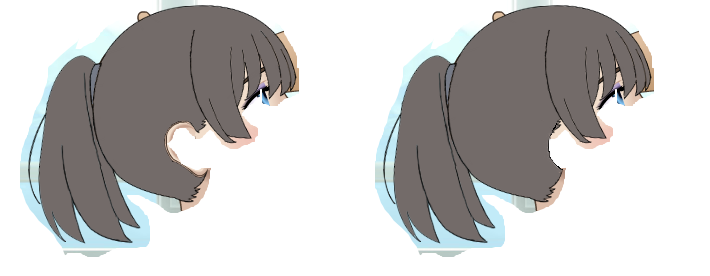
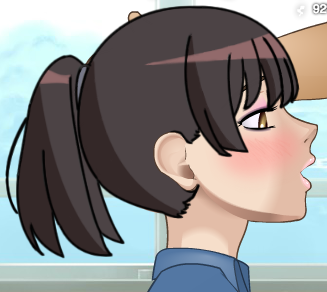
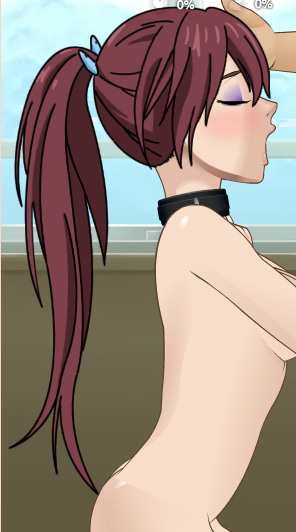
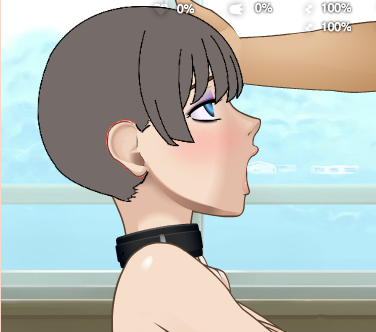
Well folks, here goes nothing. Starting to give making my own custom hairs a try. I first wanted to work on a few girls I liked, but figured I may as well give the Saekano girls a shot if something good comes out of it. I first decided to try and get Megumi down, not only cause she's best girl and a total cutie, but also because she has short, simple hair, and it couldn't hurt to start learning with that. I have a thing for ponytails, too, and I just so happened to run into a good reference of her wearing one. So here's what I got so far, in the actual game.

pRbwRuB.png


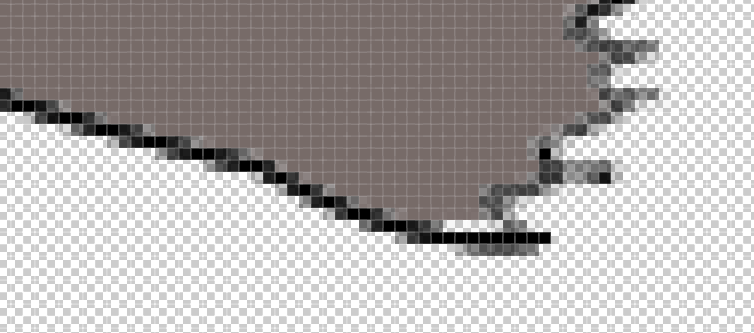
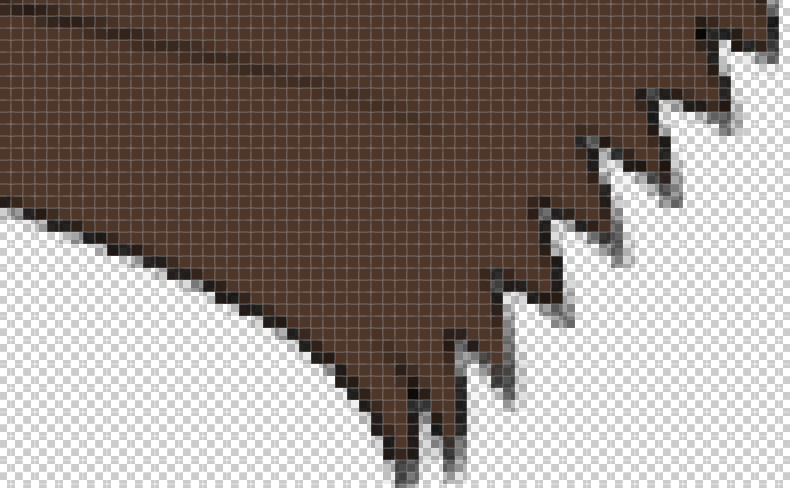
So there you go. I think the overall shape can get better with some polishing. I'm not worried about that really. My main concern is how I can get my lines from this
RM7hGDF.png

To this
phhGDeC.png

BHTz1Su.png


I'm having the hardest time with the brushes, and I don't know what's going on. On the first image, the bottom line is done with the pen tool, and stroke path. The hair . . . parts are otherwise done freehand because it just seems easier that way than fucking around with the pen tool. Then shading's gonna come up. But otherwise, I think I'm slowly getting there.
 

4dascience

Potential Patron
Joined
Nov 25, 2015
By the way, if any other artists who are more skilled come along and want to do the Saekano girls, be my guest :D You guys could do a better job than me, so by all means, go ahead. In the meantime, I still want to polish this as best as I can.
 

Mineur

Content Creator
Joined
Feb 18, 2011
I'm having the hardest time with the brushes, and I don't know what's going on. On the first image, the bottom line is done with the pen tool, and stroke path. The hair . . . parts are otherwise done freehand because it just seems easier that way than fucking around with the pen tool. Then shading's gonna come up. But otherwise, I think I'm slowly getting there.
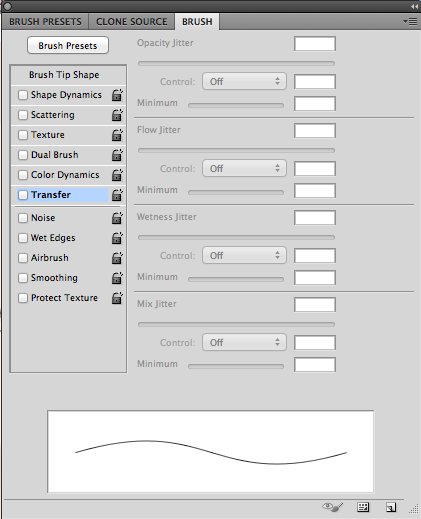
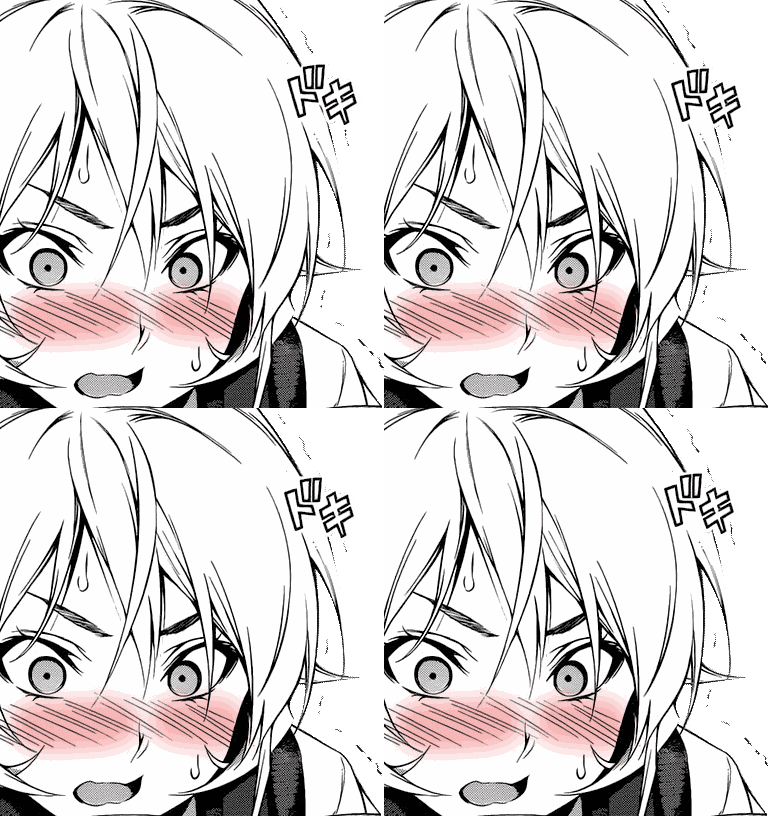
Looks good as a start. How do you create the lines atm? Cuz it looks like you either use a stronger or bigger brush, or you stroke it multiple times.

(Is that my Quiet import perhaps btw? ;) )
 

4dascience

Potential Patron
Joined
Nov 25, 2015
Looks good as a start. How do you create the lines atm? Cuz it looks like you either use a stronger or bigger brush, or you stroke it multiple times.

(Is that my Quiet import perhaps btw? ;) )

It is, actually! I figured it was the closest example to what I have in mind! I'll admit, I've only ever really used Photoshop for minor work, so I barely know how to actually use it. I found out you can stroke the path of the pen tool, and that was pretty great. But I do stroke multiple times, and tried experimenting with having it simulate pressure, and can't really get it down. At some point I tried messing around with a Wacom, and couldn't get the drivers going so it could mimic pencil and pressure on the pen, and since then I haven't been able to really know what the hell is going on with my brushes. The flow was way out of whack, and the pressure got in the way, and to be honest, I don't know what I'm doing. I just redid the stroking, and it looks lighter with the pressure sim on, and if I only stroke it up to 4 times.
4gFaOmf.png
 

Mineur

Content Creator
Joined
Feb 18, 2011
It is, actually! I figured it was the closest example to what I have in mind! I'll admit, I've only ever really used Photoshop for minor work, so I barely know how to actually use it. I found out you can stroke the path of the pen tool, and that was pretty great. But I do stroke multiple times, and tried experimenting with having it simulate pressure, and can't really get it down. At some point I tried messing around with a Wacom, and couldn't get the drivers going so it could mimic pencil and pressure on the pen, and since then I haven't been able to really know what the hell is going on with my brushes. The flow was way out of whack, and the pressure got in the way, and to be honest, I don't know what I'm doing. I just redid the stroking, and it looks lighter with the pressure sim on, and if I only stroke it up to 4 times.

Haha I thought I recognized the lines and the color ^^
Oh I see, I hadnt used PS for anything rly advanced b4 getting into making imports either so that shouldnt be a big problem for you. Hmm I dunno, if u feel that u might have changed something u shouldnt and fucked something up you can always reset it to vanilla settings.

However I dont rly use the Simulate Pressure option, and I only stroke once for the layer with the outlines. Dunno if that is to any help but ^^
 

Mineur

Content Creator
Joined
Feb 18, 2011
Hmm. How do you "ink" the rest of the outline, then? What sort of brush settings?
I usually use a new layer bellow the outline for the coloring, that one with a very soft stroke like 25% flow once.


Btw, do u have a link or something for your ava? I love it ^^
 

4dascience

Potential Patron
Joined
Nov 25, 2015
I usually use a new layer bellow the outline for the coloring, that one with a very soft stroke like 25% flow once.


Btw, do u have a link or something for your ava? I love it ^^

My avatar? It's Erina from Shokugeki.
WHmgTk4.gif

Anyway, here's an update.
2VjVpEF.png


Ended up redoing the hair parts by the neck and ear with the pen tool, was easier than I thought and looks nicer. I think the lines are looking a little better, too, but still getting there.
 

stuntcock

Content Creator
Joined
Jun 5, 2012
I think the lines are looking a little better, too, but still getting there.
I use vector drawing exclusively for SDT projects, so I can't provide much guidance on the brush settings and inking stuff.

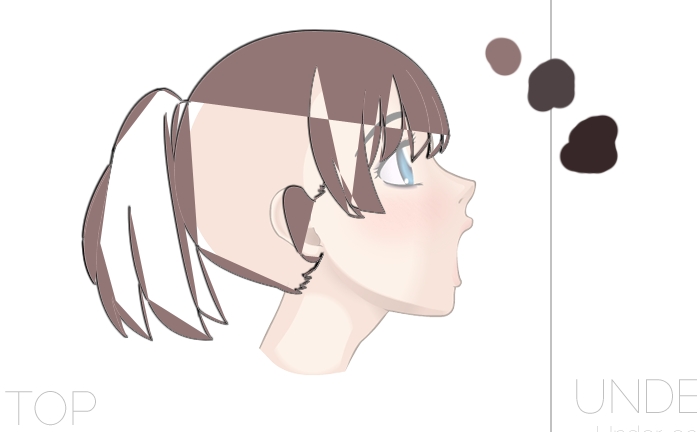
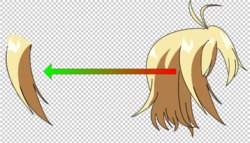
However, it does seem that you've "cropped out" a section of hair around the ear. This isn't necessary, because the game assembles the composite scene by putting the hair layer below the ear layer. The prefered approach is to simply draw a continuous "hairline" behind the ear. As a bonus, this approach ensures that you won't have any unexpected "holes" in your hair if someone decides to switch to the Small Ears or Elf Ears.

Crude sketch:


Note: I lied earlier. Your PNG file defines three layers (corresponding to the three usable quadrants on the canvas). One of them will be included in the scene on top of the ear, and one will be placed beneath the ear (the third is "behind" the entire head - it defines the "left side" of the hairstyle). So -- if you were forced to crop out the ear-hole because your hair kept inappropriately appearing on top of the ear, then the solution is to drag your work to a different quadrant of the canvas.
 

Mineur

Content Creator
Joined
Feb 18, 2011
My avatar? It's Erina from Shokugeki.
WHmgTk4.gif

Anyway, here's an update.

Ended up redoing the hair parts by the neck and ear with the pen tool, was easier than I thought and looks nicer. I think the lines are looking a little better, too, but still getting there.

Ofc I know that, just wanted a link to the gif ^^ Thanks!

Ya its starting to shape up! And as Stuntcock, let the game crop out the part around the ears instead. Its way easier and failproof ;)
 

4dascience

Potential Patron
Joined
Nov 25, 2015
I use vector drawing exclusively for SDT projects, so I can't provide much guidance on the brush settings and inking stuff.

However, it does seem that you've "cropped out" a section of hair around the ear. This isn't necessary, because the game assembles the composite scene by putting the hair layer below the ear layer. The prefered approach is to simply draw a continuous "hairline" behind the ear. As a bonus, this approach ensures that you won't have any unexpected "holes" in your hair if someone decides to switch to the Small Ears or Elf Ears.

Crude sketch:


Note: I lied earlier. Your PNG file defines three layers (corresponding to the three usable quadrants on the canvas). One of them will be included in the scene on top of the ear, and one will be placed beneath the ear (the third is "behind" the entire head - it defines the "left side" of the hairstyle). So -- if you were forced to crop out the ear-hole because your hair kept inappropriately appearing on top of the ear, then the solution is to drag your work to a different quadrant of the canvas.

I wasn't sure I understood how that worked, so I just figured I'd crop it out anyways, and clean it up later. What happened was, I was using a template for drawing the hair from google, instead of one of the ones someone made here so kindly. This one is definitely better, and made me realize I was working on the hair on the wrong layer of the canvas. I'm not entirely sure I get it, but we'll see.

In the meantime, I finally figured out a good brush (it was right under my nose. I feel so stupid about it), so now I just need to learn how to shade and I should be good to go!
 

4dascience

Potential Patron
Joined
Nov 25, 2015
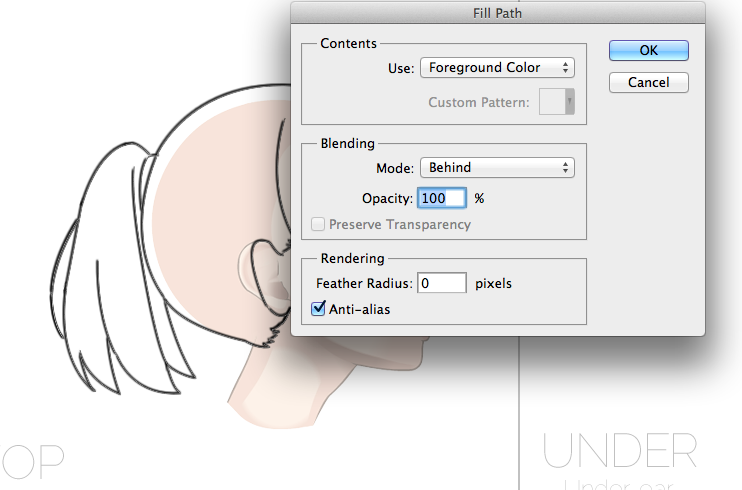
Well, I think it looks better now. But I still can't get around coloring and shading. I've wasted I dunno how much time looking for a decent tutorial, but none of them are in depth or anything, and just speed through it. A few people recommended using the pen tool to fill it in, but even that I'm messing up.

ZvL5Cee.png
llMRTHF.png


And everywhere I see people coloring over layers just freely with a brush, but the colors stay within the lines automatically, and they draw over it, and so on, and I can't figure out how any of that happens. Anybody got tips or a decent tutorial or something? I don't want to give up after all this.
 

4dascience

Potential Patron
Joined
Nov 25, 2015
Well, I guess this is as good as it got. What do you guys think?
kqcxXK5.png


Why don't you guys test it out, and lemme know what you think.
 

Attachments

  • Megumi Kato II.png
    Megumi Kato II.png
    68.5 KB · Views: 439

stuntcock

Content Creator
Joined
Jun 5, 2012
Why don't you guys test it out, and lemme know what you think.
Good work. It looks like you sorted out the brush difficulties. The curves are smooth with no obvious flaws.

The outline is thicker than it needs to be. Ideally, it should be the same thickness as the outline which surrounds the face and clothes (so that they all blend together into one big seamless common outline for everything).

The cropping-out for the ear is too aggressive. If you switch to a different ear option then you'll notice a gap. You can fill in pretty much the entire concavity. Trust the game's layering system to draw the ear above the hair; the visual result will be the same as if you had done the cropping (but without the actual work).

4hGdCL5.png


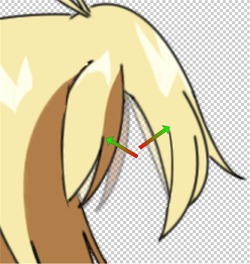
When hair is gathered into a ponytail, the internal lines should usually converge into or at least towards the fastener. One of your lines runs vertically within the ponytail but doesn't seem to "meet" the fastener. It may just be a minor error in the reference image. If it's deliberate then it would suggest a special 3d texture effect in the hair (which is possible, but is normally found in longer hairstyles).

The "halo" highlight pattern is atypical for SDT hairstyles. If you browse through the vanilla options, you'll see that Morrigan is the only one which uses this style (and in her case it's an interrupted halo). Most of the default hairstyles draw miniature highlights (in various jagged shapes) upon each strand of hair. The primary reason for this policy is that Konashion animated most of his hairstyles -- a continuous halo would have been "broken" whenever a strand of hair moved, while the individual jagged highlights can move around with their individual strands without generating obvious visual flaws.

Konashion's initial choices dictated the visual style of the game, and they have influenced the way that subsequent artists have contributed to it. That's not to say that you should always follow Konashion's style; the halo-reflection appears consistently in Saekano reference images and removing it might actually detract from characterization (make the characters feel less genuine). As you become more comfortable with the tools, though, you may find opportunities to blend different artistic styles. And if you collaborate with an animator then they might insist that you to split up the reflection pattern ("Characterization be damned! A big unbroken shiny band is very difficult to work with!").

As an example, you might look at ZeV's China Kousaka hairstyle. He uses vector-drawing for most of his work, so he achieved a very subtle halo-highlight effect by simply drawing a lot of thin vertical lines in a horizontal band across the head.

Minor point: you may also want to tinker with the color balance - perhaps boost the red. The hair feels slightly grey to me, presumably because the reference image was an indoor scene. The coloration of SDT hairstyles tends to assume outdoor lighting, and viewers may be cued to expect such lighting in any new hairstyles that they download. Not a huge problem, though, because SDT allows users to tweak the tint of a hairstyle via sliders.
 

Mineur

Content Creator
Joined
Feb 18, 2011
Well, I think it looks better now. But I still can't get around coloring and shading. I've wasted I dunno how much time looking for a decent tutorial, but none of them are in depth or anything, and just speed through it. A few people recommended using the pen tool to fill it in, but even that I'm messing up.

ZvL5Cee.png
llMRTHF.png

And everywhere I see people coloring over layers just freely with a brush, but the colors stay within the lines automatically, and they draw over it, and so on, and I can't figure out how any of that happens. Anybody got tips or a decent tutorial or something? I don't want to give up after all this.

You should just use the pentool for the out lines for the shadowing imo and stroke the paths, not fill them. Then just go with the paint bucket and fill the missing parts by hand with the brush ;)

And it looks good for a first import! I'd try to stick with thinner lines in the future but thats just my personal opinion, its up to you to find out what style you prefer ^^
 

4dascience

Potential Patron
Joined
Nov 25, 2015
Good work. It looks like you sorted out the brush difficulties. The curves are smooth with no obvious flaws.

The outline is thicker than it needs to be. Ideally, it should be the same thickness as the outline which surrounds the face and clothes (so that they all blend together into one big seamless common outline for everything).

The cropping-out for the ear is too aggressive. If you switch to a different ear option then you'll notice a gap. You can fill in pretty much the entire concavity. Trust the game's layering system to draw the ear above the hair; the visual result will be the same as if you had done the cropping (but without the actual work).

4hGdCL5.png


When hair is gathered into a ponytail, the internal lines should usually converge into or at least towards the fastener. One of your lines runs vertically within the ponytail but doesn't seem to "meet" the fastener. It may just be a minor error in the reference image. If it's deliberate then it would suggest a special 3d texture effect in the hair (which is possible, but is normally found in longer hairstyles).

The "halo" highlight pattern is atypical for SDT hairstyles. If you browse through the vanilla options, you'll see that Morrigan is the only one which uses this style (and in her case it's an interrupted halo). Most of the default hairstyles draw miniature highlights (in various jagged shapes) upon each strand of hair. The primary reason for this policy is that Konashion animated most of his hairstyles -- a continuous halo would have been "broken" whenever a strand of hair moved, while the individual jagged highlights can move around with their individual strands without generating obvious visual flaws.

Konashion's initial choices dictated the visual style of the game, and they have influenced the way that subsequent artists have contributed to it. That's not to say that you should always follow Konashion's style; the halo-reflection appears consistently in Saekano reference images and removing it might actually detract from characterization (make the characters feel less genuine). As you become more comfortable with the tools, though, you may find opportunities to blend different artistic styles. And if you collaborate with an animator then they might insist that you to split up the reflection pattern ("Characterization be damned! A big unbroken shiny band is very difficult to work with!").

As an example, you might look at ZeV's China Kousaka hairstyle. He uses vector-drawing for most of his work, so he achieved a very subtle halo-highlight effect by simply drawing a lot of thin vertical lines in a horizontal band across the head.

Minor point: you may also want to tinker with the color balance - perhaps boost the red. The hair feels slightly grey to me, presumably because the reference image was an indoor scene. The coloration of SDT hairstyles tends to assume outdoor lighting, and viewers may be cued to expect such lighting in any new hairstyles that they download. Not a huge problem, though, because SDT allows users to tweak the tint of a hairstyle via sliders.
Thanks a bunch, Stunt. I'll definitely consider it when I redo it (whenever that comes along). I've been terribly busy prepping for finals, so I haven't really been able to get myself to go back to it. Mostly cause I'm a lazy bastard and think it looks good as is for the moment. Once I get my skills improved, I'll give it another shot for sure.

You should just use the pentool for the out lines for the shadowing imo and stroke the paths, not fill them. Then just go with the paint bucket and fill the missing parts by hand with the brush ;)

And it looks good for a first import! I'd try to stick with thinner lines in the future but thats just my personal opinion, its up to you to find out what style you prefer ^^
I'm STILL trying to figure out how to get the lines right. I thought I had it done in this new one I'm posting, too, but at the very end when flattening everything to try it out, there were still a lot of clearish parts in the lines.


And yes, I should be studying, but I somehow managed to get this done. What do you guys think? Try it out

Q477hnf.png
 

Attachments

  • Gou Trial.png
    Gou Trial.png
    135.4 KB · Views: 446

stuntcock

Content Creator
Joined
Jun 5, 2012
I'm STILL trying to figure out how to get the lines right. I thought I had it done in this new one I'm posting, too, but at the very end when flattening everything to try it out, there were still a lot of clearish parts in the lines.
I don't know what "clearish" means. Excessive transparency?

And yes, I should be studying, but I somehow managed to get this done. What do you guys think?
The "pose" of the ponytail is good - it avoid body collision without obviously appearing as though it's been twisted away from the body.

It looks like you've chosen colors from the third reference image from your thread. I would have used the first or fourth images for color-selection. SDT uses a very bright and colorful palette, so the more saturated reds might be a better fit. Admittedly, this only matters if you're trying to act as an "ambassador" for your character - you're trying to ensure that her SDT incarnation gives SDT users an accurate sense of her original design. If you're creating the character simply because you like her and want her available in your own game, then ignore my ramblings and just choose whichever colors you like :)

The outline is still a bit too thick. But that might be related to the line trouble that you mentioned above.

You can move parts of the hairstyle to different quadrants in order to make the ear appear. Note: the link shows a shitty hack-job; you can probably create a proper version if you still have all of the separate layers of your drawing.

Aside from that, my only real complaint is that it's still a raster drawing. Raster stuff is a pain-in-the-ass to animate, and so it tends to put limits on your creativity. Beyond shoulder-length hair, static hairstyles just seem unnaturally stiff. Even when they're drawn with beautiful and intricate detail (example), their rigidity clashes with the animation of the scene around them.

You can still create a lot of nice designs. For example, the short-hair version of Angelize could be done as a static hairstyle. You can usually complete the work more quickly than a vector artist. But you may find yourself instinctively shying away from long hairstyles - even in cases where you adore the character design. For example: SyntaxTerror has pretty much refused to work with many of the long-haired KanColle girls because he isn't happy with the results.
 

Mineur

Content Creator
Joined
Feb 18, 2011
I'm STILL trying to figure out how to get the lines right. I thought I had it done in this new one I'm posting, too, but at the very end when flattening everything to try it out, there were still a lot of clearish parts in the lines.


And yes, I should be studying, but I somehow managed to get this done. What do you guys think? Try it out

Q477hnf.png

How do you make the lines and what settings do you use then? Cuz 1px 1 stroke for the outline layer should work just fine from my experience.

Starting to look good! And if you want even thinner lines btw you can make the end part of them fade out into the hair intead of being rough the whole way. Hmm not sure if my message got through there but check any of my imports and you'll understand otherwise ^^
 

4dascience

Potential Patron
Joined
Nov 25, 2015
How do you make the lines and what settings do you use then? Cuz 1px 1 stroke for the outline layer should work just fine from my experience.

Starting to look good! And if you want even thinner lines btw you can make the end part of them fade out into the hair intead of being rough the whole way. Hmm not sure if my message got through there but check any of my imports and you'll understand otherwise ^^

I think I finally figured out a way how. It actually hit me while I was sleeping. What do you think now? Shading's a bit iffy, but I wrestled with it for too long to care anymore.

And then I noticed the ear. I'll get around fixing that somehow.
I don't know what "clearish" means. Excessive transparency?

The "pose" of the ponytail is good - it avoid body collision without obviously appearing as though it's been twisted away from the body.

It looks like you've chosen colors from the third reference image from your thread. I would have used the first or fourth images for color-selection. SDT uses a very bright and colorful palette, so the more saturated reds might be a better fit. Admittedly, this only matters if you're trying to act as an "ambassador" for your character - you're trying to ensure that her SDT incarnation gives SDT users an accurate sense of her original design. If you're creating the character simply because you like her and want her available in your own game, then ignore my ramblings and just choose whichever colors you like :)

The outline is still a bit too thick. But that might be related to the line trouble that you mentioned above.

You can move parts of the hairstyle to different quadrants in order to make the ear appear. Note: the link shows a shitty hack-job; you can probably create a proper version if you still have all of the separate layers of your drawing.

Aside from that, my only real complaint is that it's still a raster drawing. Raster stuff is a pain-in-the-ass to animate, and so it tends to put limits on your creativity. Beyond shoulder-length hair, static hairstyles just seem unnaturally stiff. Even when they're drawn with beautiful and intricate detail (example), their rigidity clashes with the animation of the scene around them.

You can still create a lot of nice designs. For example, the short-hair version of Angelize could be done as a static hairstyle. You can usually complete the work more quickly than a vector artist. But you may find yourself instinctively shying away from long hairstyles - even in cases where you adore the character design. For example: SyntaxTerror has pretty much refused to work with many of the long-haired KanColle girls because he isn't happy with the results.

Alas, I never considered the clipping. I honestly wouldn't mind learning how to make dynamic hairs either, but I'm definitely a long way before tackling that. I went ahead and decided to give Ange a try by myself, though.
 

Attachments

  • Angelize.png
    Angelize.png
    105.6 KB · Views: 430

stuntcock

Content Creator
Joined
Jun 5, 2012
I honestly wouldn't mind learning how to make dynamic hairs either, but I'm definitely a long way before tackling that.
If you'd like, we could tackle a dynamic hairstyle project collaboratively. You'd supply the reference artwork, and then we'd walk through the steps of tracing it and animating it. You could then use the completed FLA file (and the walkthrough documentation+screenshots) as a guide for future solo projects - and it could serve as a tutorial resource for others.

@skymastolf66 and I worked through a similar collaborative project a while ago, but he wasn't interested in creating dynamic hair mods. So we provided some discussion of the design decisions, but we didn't actually produce a step-by-step guide to hair-mod creation.

The key factors are:
  • the hairstyle must be suitable for dynamic animation
    • you can find a brief overview of dynamic-hair attributes here, and specific details here
    • there's a "sweet spot" to aim for. If the hairstyle is too simple then it isn't worth the effort of animating; if it's too complex then the FPS penalty will make the hairstyle unusable during normal gameplay.
    • I prefer hairstyles with weird shapes, because they give me an opportunity to test the limits of the physics code. But I'm not going to insist on a goofy hairstyle; you're free to propose a realistic hairstyle from one of your favorite anime or videogame characters.
  • the hairstyle must be drawn with redundant/overlapping details
    • when a strand of hair swings aside, we should be able to see another layer of hair underneath it. We shouldn't see a blank patch of scalp.
    • therefore we need to make assumptions about underlying hair layers (which usually aren't visible in the reference image). We can draw in these details by relying on secondary reference images, or just make them up with imagination.
    • we need to maintain lots of separate layers while working on the image (in GIMP, Photoshop, InkScape, or whatever). The "Merge Layers" command is taboo.
  • the hair image must be in vector format before it can be properly animated
    • ideally, it would be drawn/traced in vector form
    • if you're more comfortable with raster tools, then you could hand off a raster image and I could trace it before proceeding with the project

I went ahead and decided to give Ange a try by myself, though.
  • overall impression: nicely done! You've shown a lot of improvement in just a few days :)
  • the outline is too thick. Zooming in shows it to be wider than the outline of the girl's face, and it's noticeably "fuzzy."
    • a thinner and sharper outline would blend in more nicely.
  • the ahoge strands tend to disappear off the top of the screen at normal zoom levels. This isn't an "artistic flaw"; you've accurately recreated the original design. But it's an example where it might be appropriate to tweak the original design so that it fits better into the gameplay scene.
    • this is especially important with dynamic-hair projects. There's no sense in spending an hour carefully animating the ahoge strands if they're going to get clipped off by the edge of the game window.
    • sby's animtools mod allows users to "pan" the camera upwards, or zoom out so that the entire hairstyle remains visible. So ... if clipping becomes a problem then we might choose to fiddle with the camera instead of adjusting the actual hair.
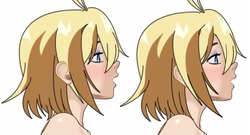
  • the "sidelock" strand should be moved to the top-left quadrant so that it passes over the ear
  • the bangs can be reshaped slightly to avoid eclipsing the eye. Eye movement and eye contact are very important in SDT because they inform the player about the girl's emotional state. We shouldn't block the eye unless it's absolutely necessary; we should also leave the eyebrow visible when possible.
  • the bangs could be tweaked further so that they pass behind the nose (as shown in the reference images)
    • I haven't bothered to do so here (because laziness)
Before and after:
 

Users who are viewing this thread

Top


Are you 18 or older?

This website requires you to be 18 years of age or older. Please verify your age to view the content, or click Exit to leave.